
The last weeks and months all the documents (e.g. by Edward Snowden) delivered the evidence what many people already knew without being able to prove it. There is nothing that may not be surveilled.
Reducing the risk is only possible by not using services like Facebook, Google, etc … Thus setting up an own service or using a confidential one is the only solution. I don’t bother this topic, as everybody should decide whether to use, or not to use it.
But even when not using such services it is possible to identify the origin of communication in the internet. So obfuscating its own communication is way to reduce the risk of being surveilled.
Concerning using tor
Pro
- Obfuscates communication (simply one point, but that’s the point why to use it (: )
Cons
- Slower than normal communication (bandwidth and response time)
- You must to know how to use it
- A bad proxy may disrupt the aim of obfuscating communication
- You must know how to use it
- Location based services won’t work any more
When using tor in order to obfuscate your communication, the communication is routed over a number of servers around the world. Sending all the data around the globe simply slows down the communication.
Setting up a tor node
This example describes installing a tor server using Ubuntu.
sudo apt-get install tor
That’s it! Isn’t it quite simple? It installs a tor server, as well as scripts that start and stop the tor server. The server is looking up for other tor servers in order to connect to the tor network. So it is possible to use a tor server out-of-the-box.
Configuration
Ok a little bit of configuration is required. Simply change the required lines in:
/etc/tor/torrc
All the examples written down here use the address of this server. After modifying this configuration file a reload of the tor service is required.
/etc/init.d/tor reload
Defining the type of tor node
There are three types of tor nodes:
- Entry (Simply a member of the tor network without accessing the internet directly)
- Bridge (Special type of node in case nobody should know you set up an entry point)
- Exit (Accesses the internet out of the tor network; in case there is a user that does something illegal, this node is registered as the source)
For setting up a entry node:
Address robert-franz.com # name of the server
ORPort 9001 # port for the tor network
ExitPolicy reject *:* # no exits to the internet is allowed
# but this improves the speed of the tor network
Using SOCKS
SocksPort 9050 # proxy port
SocksListenAddress 46.38.250.243 # ip address the proxy is accessible
SocksPolicy accept 0.0.0.0/0 # limitations, the proxy is accessible from
# might be a local network like 192.168.0.0/16
Using tor
As tor is working as a SOCKS proxy server in this setup, there must be added a SOCKS proxy in the network configuration of the operating system. Otherwise it is possible to enter a proxy configuration in the application of choice. This ensures, that all the communication is running over the tor server. Often it is possible to exclude the local network. This is definately suggested, as otherwise it would not be possible to access resources on the local network.
Only two are required in order to use the own tor server.
- Servername
- Port (per default 9050)
Setting up tor in ubuntu
System Settings -> Network -> Network proxy

Network configuration for tor in ubuntu
Setting up tor in macos
For the following screenshot represents the german version of MacOS.
System Settings -> Network -> “Select Netzwork adapter” -> Options > Proxies -> Socks Proxy
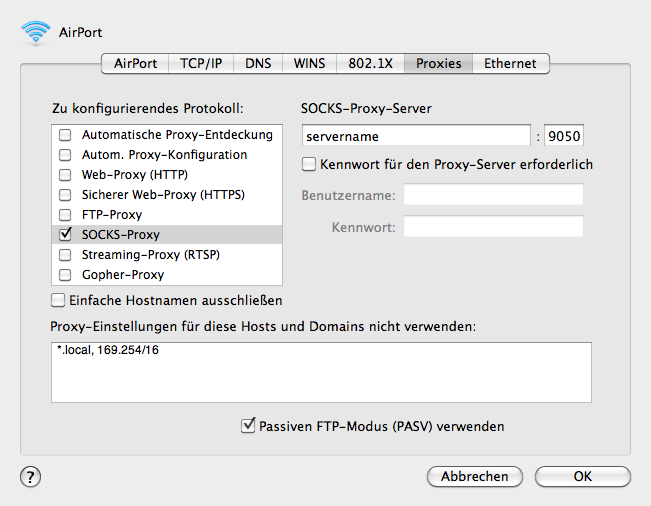
Network configuration for tor in macos
Setting up tor in windows
Start -> Control Panel -> Network -> Internet Options -> Connections -> LAN -> “Aktivate Use Proxy Server” -> Advanced
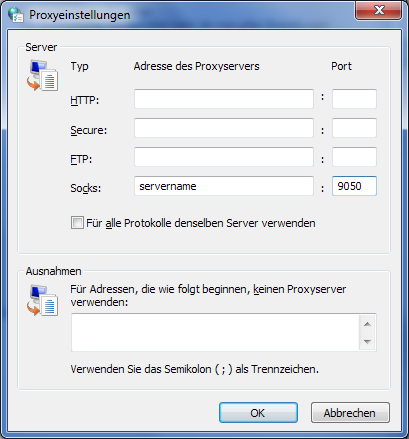
Network configuration for tor in windows 7
Conclusion
Setting up a tor node is quite simple. Of course tor is not the solution for not being surveilled, but it’s a step into the right direction. A lot of more work must be done in order to really protect your privacy. Furthermore using a SOCKS proxy simpifies the usage of tor. Even without installing softare on the device of choice.